
I bought my sister the book
Artisan Bread in Five Minutes a Day and
Healthy Bread in Five Minutes a Day for Christmas. I had it sent to my house and I was going to mail them to her with the rest of the family's presents, but when they came, they were a lot heavier than I thought. It would have cost me more than I wanted to ship them to her, so since I really wanted the books anyway, I ended up buying them again from Amazon and having them shipped directly to her and I kept the first books that I ordered. Merry Christmas to me!
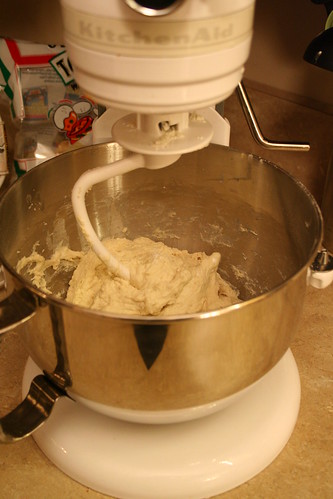
Last week I finally had time to start reading the first book and I tried my first batch of bread. It is a really interesting concept where you make a large batch of dough and let it rise before putting it into the refrigerator.
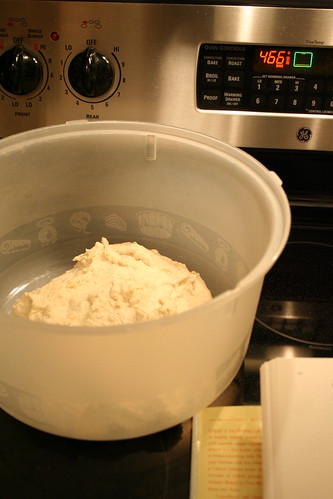
You can keep the dough in the refrigerator for up to 14 days and take out a hunk to make your bread whenever you want. (I kept my dough in an upside down layer cake container)
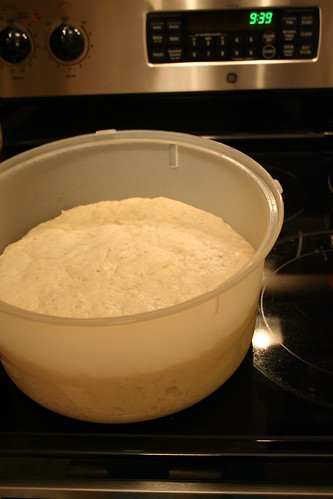
When you decide that it is time to make bread, you just take a grapefruit size piece out, fold the sides under (without kneading!) and place it on cornmeal to rise for 40 minutes.
After 20 minutes you preheat your oven with a stone and broiler pan inside. Slide the dough off the cornmeal onto the stone and quickly pour water into the broiler pan and close the door. Bake for 30 minutes or until the crust is very brown and it is done!
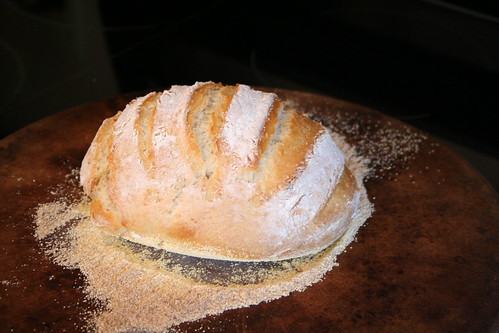
It really does only take about 5 minutes. (Minus the rising and baking time when you can be doing other stuff) I was impressed with how crunchy, crispy, crumbly the crust was while the inside stayed so soft and moist. I am going to try to use less yeast next time because it did have a pretty strong yeast flavor. There are instructions on the
Artisan Bread in Five Minutes a Day Website on how to do this. I also need to buy unbleached flour because my bread was a little bit dense and I read that the unbleached flour helps with this.
There are so many different recipes and variations of the one concept presented in these books. I can't wait to try more. I am especially looking forward to the pita bread and the caramel rolls.


 I usually like a longer handle on my bags, but I followed the pattern on this one. Just like a real shopping bag, this handle is shorter and is meant to fit on your arm and not over your shoulder. If you desire to carry it on your shoulder you can just make the straps a little big longer.